
Crafting Personalized Wooden Ornaments for Special Occasions: Customized Wooden Ornament Ideas
- Jovanna Nelson

- Dec 22, 2025
- 4 min read
When it comes to celebrating special moments, nothing quite captures the heart like a handcrafted keepsake. I’ve always found that customized wooden ornament ideas bring a unique warmth and charm to any occasion. Whether it’s a birthday, anniversary, holiday, or a milestone event, these ornaments add a personal touch that feels truly special. Today, I want to share with you how you can create these beautiful pieces yourself or find the perfect ones to gift, making every celebration memorable.
Why Choose Customized Wooden Ornament Ideas?
There’s something magical about wood as a material. It’s natural, warm, and timeless. When you choose customized wooden ornament ideas, you’re not just picking a decoration; you’re selecting a piece that tells a story. These ornaments can be tailored to reflect personalities, interests, and memories, making them far more meaningful than generic store-bought items.
Here are a few reasons why I love these ornaments:
Durability: Wood lasts for years, becoming even more beautiful with time.
Versatility: They can be painted, engraved, or left natural.
Eco-friendly: Wood is a renewable resource, especially when sourced responsibly.
Personalization: You can add names, dates, or special messages.
Imagine a Christmas tree adorned with ornaments that celebrate your family’s unique journey or a sports fan’s collection featuring their favorite team’s logo carved into wood. The possibilities are endless and exciting!

How to Create Your Own Customized Wooden Ornaments
If you’re feeling crafty, making your own wooden ornaments can be a rewarding project. It’s easier than you might think, and the process allows you to infuse your personality into every detail. Here’s a simple step-by-step guide to get you started:
Materials You’ll Need:
Thin wooden slices or pre-cut wooden shapes
Sandpaper (fine grit)
Wood burning tool or engraving pen
Acrylic paints and brushes (optional)
Clear sealant spray
Ribbon or twine for hanging
Step-by-Step Process:
Prepare the Wood: Lightly sand the wooden pieces to smooth out any rough edges.
Design Your Ornament: Sketch your design on paper first. It could be a name, date, symbol, or a simple pattern.
Transfer the Design: Use a pencil to lightly draw your design onto the wood.
Engrave or Paint: Carefully burn the design into the wood with a wood burning tool or paint it with acrylics.
Seal the Ornament: Once dry, spray a clear sealant to protect your design.
Add a Hanger: Attach a ribbon or twine loop for easy hanging.
This hands-on approach not only results in a beautiful ornament but also creates a cherished memory of the crafting experience itself.
Unique Customized Wooden Ornament Ideas for Every Occasion
Personalized wooden ornaments are incredibly versatile. Here are some ideas tailored to different special occasions that you might find inspiring:
For Holidays:
Christmas: Engrave family names or the year on wooden snowflakes or stars.
Easter: Create bunny or egg-shaped ornaments with pastel paint and delicate patterns.
For Birthdays:
Milestone Birthdays: Use numbers and birthdates with decorative flourishes.
Kids’ Birthdays: Carve favorite animals, cartoon characters, or sports themes.
For Anniversaries:
Wedding Dates: Heart-shaped ornaments with the couple’s names and wedding date.
Family Trees: Small wooden leaves with each family member’s name.
For Sports Fans:
Team Logos: Carve or paint the logo of a favorite team.
Player Numbers: Personalized with jersey numbers and names.
For Homeowners:
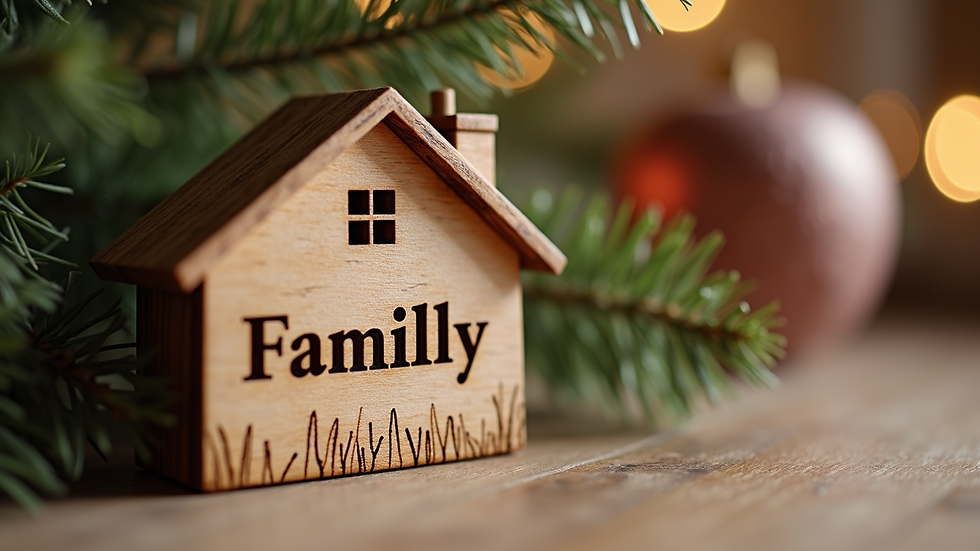
Housewarming Gifts: Ornaments shaped like houses with the family name and move-in date.
Seasonal Decor: Customized with seasonal motifs that match the home’s style.
These ideas can be mixed and matched to suit your style and the occasion perfectly.
Where to Find Beautiful Wooden Ornaments Personalized Just for You
If crafting isn’t your thing, don’t worry! There are many talented artisans and shops that specialize in wooden ornaments personalized to your specifications. Shopping from these sources supports small businesses and ensures you receive a high-quality, handcrafted product.
When choosing a vendor, consider these tips:
Check Reviews: Look for positive feedback on craftsmanship and customer service.
Customization Options: Ensure they offer the type of personalization you want.
Materials Used: Confirm the wood is sustainably sourced and finished safely.
Turnaround Time: Order well in advance of your special occasion.
Many online shops also offer gift wrapping and personalized notes, making your gift even more thoughtful and ready to present.
Tips for Displaying and Caring for Your Wooden Ornaments
Once you have your beautiful customized wooden ornaments, you’ll want to keep them looking their best for years to come. Here are some friendly tips to help you display and care for them:
Display Ideas:
- Hang them on your holiday tree or wreath.
- Use them as gift tags for presents.
- Create a decorative garland by stringing several together.
- Place them on a mantel or shelf as part of a seasonal vignette.
Care Tips:
- Avoid prolonged exposure to direct sunlight to prevent fading.
- Keep them away from moisture to avoid warping.
- Dust gently with a soft cloth.
- Reapply a clear sealant every few years if needed.
By taking a little extra care, your ornaments will remain a treasured part of your celebrations for a long time.
Bringing Warmth and Meaning to Your Celebrations
Crafting or choosing customized wooden ornament ideas is more than just a creative activity - it’s a way to bring warmth, meaning, and a personal touch to your special occasions. These ornaments become keepsakes that tell stories, celebrate passions, and connect generations.
Whether you decide to make your own or find the perfect handcrafted piece, I hope you feel inspired to add this charming tradition to your celebrations. Remember, the best ornaments are those made or chosen with love and thoughtfulness. They are the little treasures that brighten your home and heart year after year.
Happy crafting and celebrating!


Comments